
With two nodes meshing on the bench (part 4), I wanted to actually see the thing I keep describing. So I modeled the OpenMANET handheld in FreeCAD from every decision I’ve made so far and rendered it from all sides. This is a concept. The real dimensions get set by the CM4 carrier board, which doesn’t exist yet, so expect the body to change. But it’s a lot easier to argue with a picture than with a bullet list.
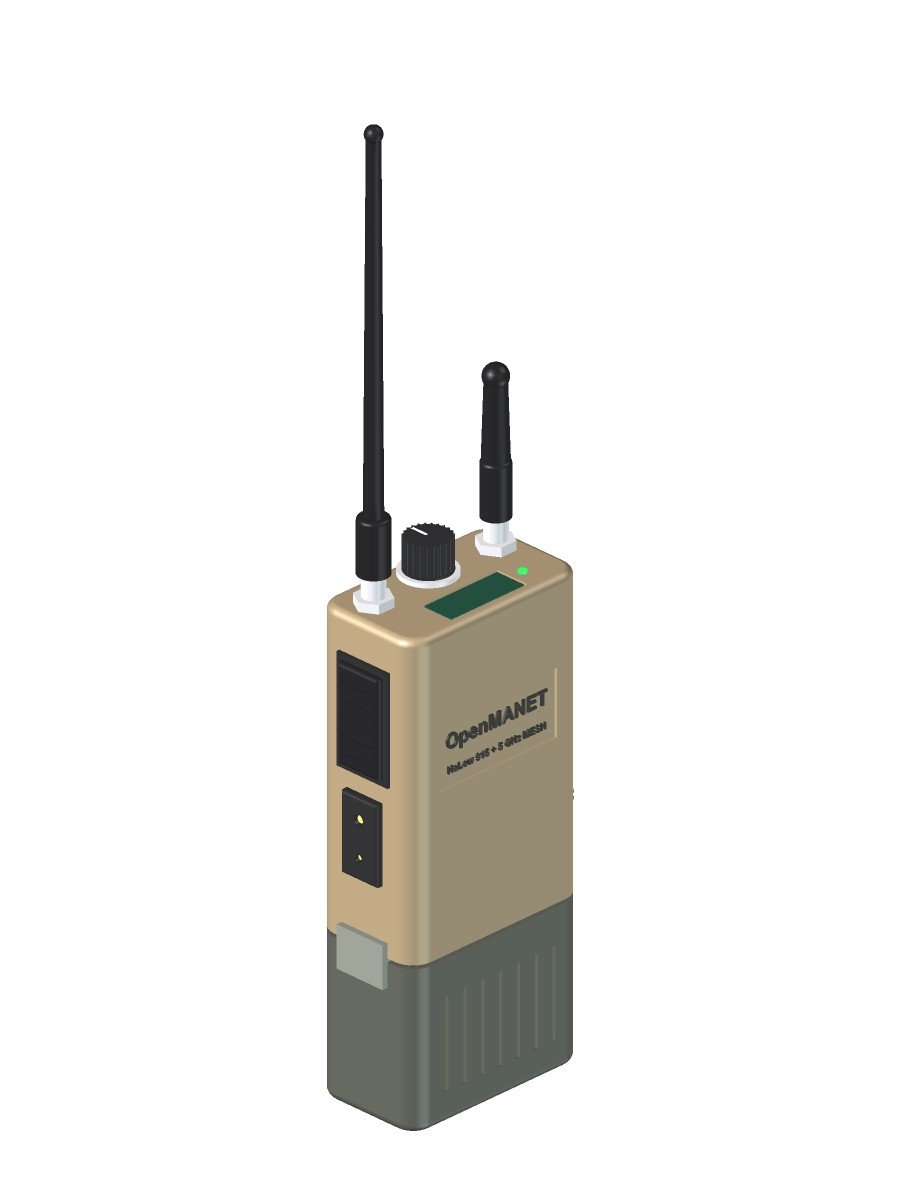
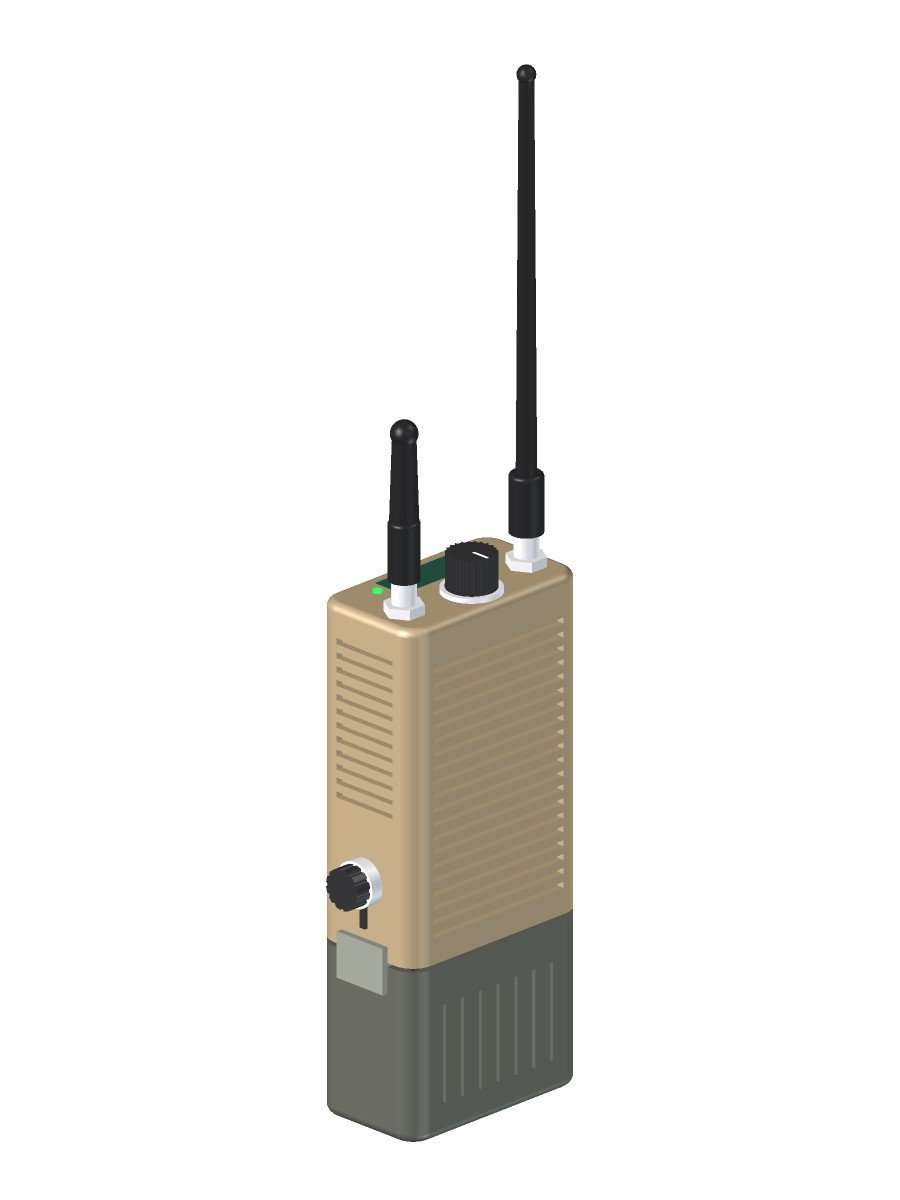
Three-quarter view: PTT and Kenwood 2-pin jack on the left side, screen and channel knob up top.
The OpenMANET handheld envelope
The size target is Silvus SC4200EP territory: a body about 102 × 67 × 38 mm before connectors, with the battery hanging off the bottom. Yes, it’s tacticool. I’ve made my peace with that.
- Printed shell, flat dark earth ASA. ASA because it handles sun and heat better than PLA or PETG.
- The shell is the heatsink. Fins on the back and the right side, with a thermal pad from the CM4 to the inside wall. No fan.
- Front face stays clean for a label and whatever ends up there once I hold it in my hand.
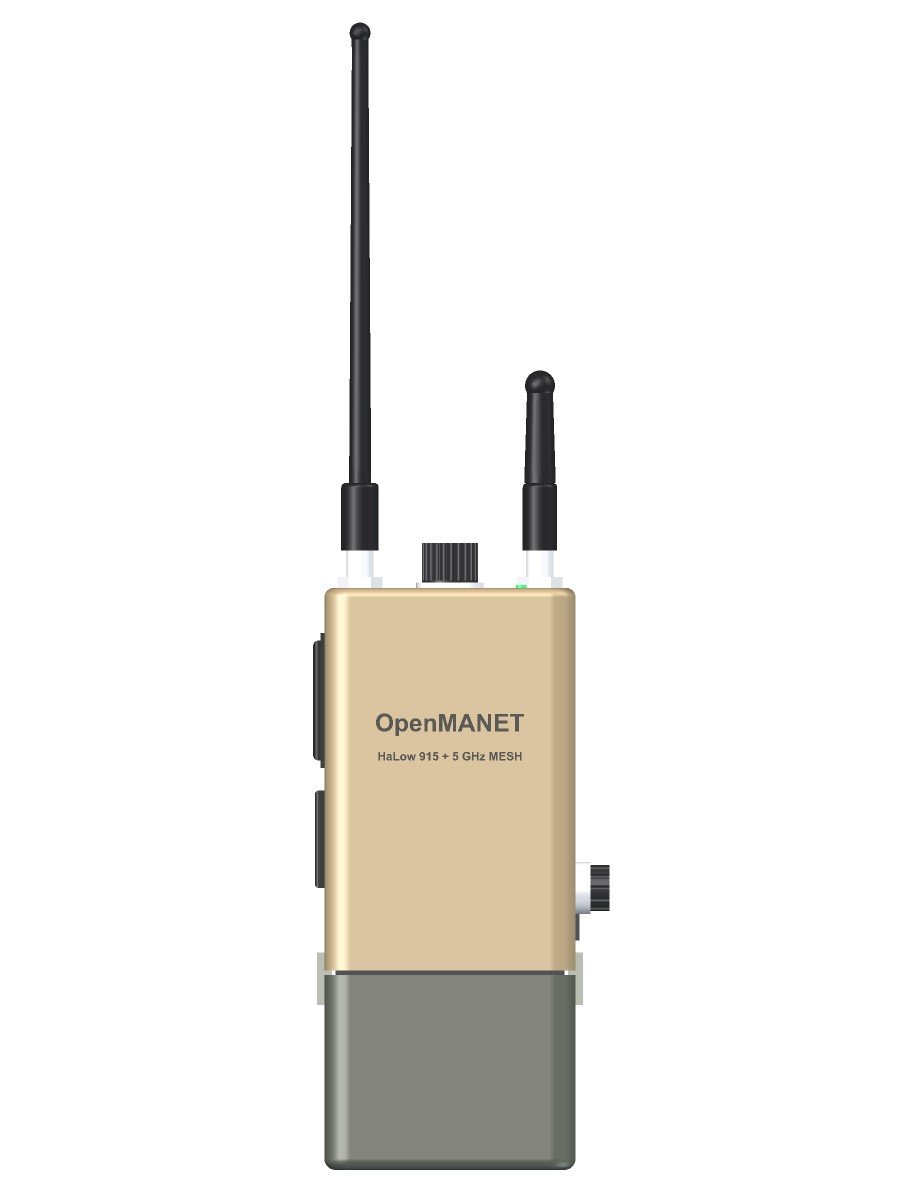
Straight-on front view. The body is about 102 × 67 × 38 mm, roughly SC4200EP-sized.
Top panel: two antennas, a knob and a screen
Everything you touch without looking lives on top.
- Two antenna ports. The tall whip is the 915 MHz HaLow mesh. The stubby one is the 5 GHz radio for the dual-band plan. Both are separate cards inside, not USB dongles.
- A real channel knob. A detented rotary switch wired straight to GPIO picks the push-to-talk talk group. Click to channel 3, and you’re talking and listening on channel 3. No phone required.
- A small status screen showing channel, mesh neighbors and signal. It has to be readable in direct sun, in the dark, and dim enough not to bloom under night vision. I haven’t picked the display that does all three yet.
- A status LED for the at-a-glance “am I on the mesh” check.
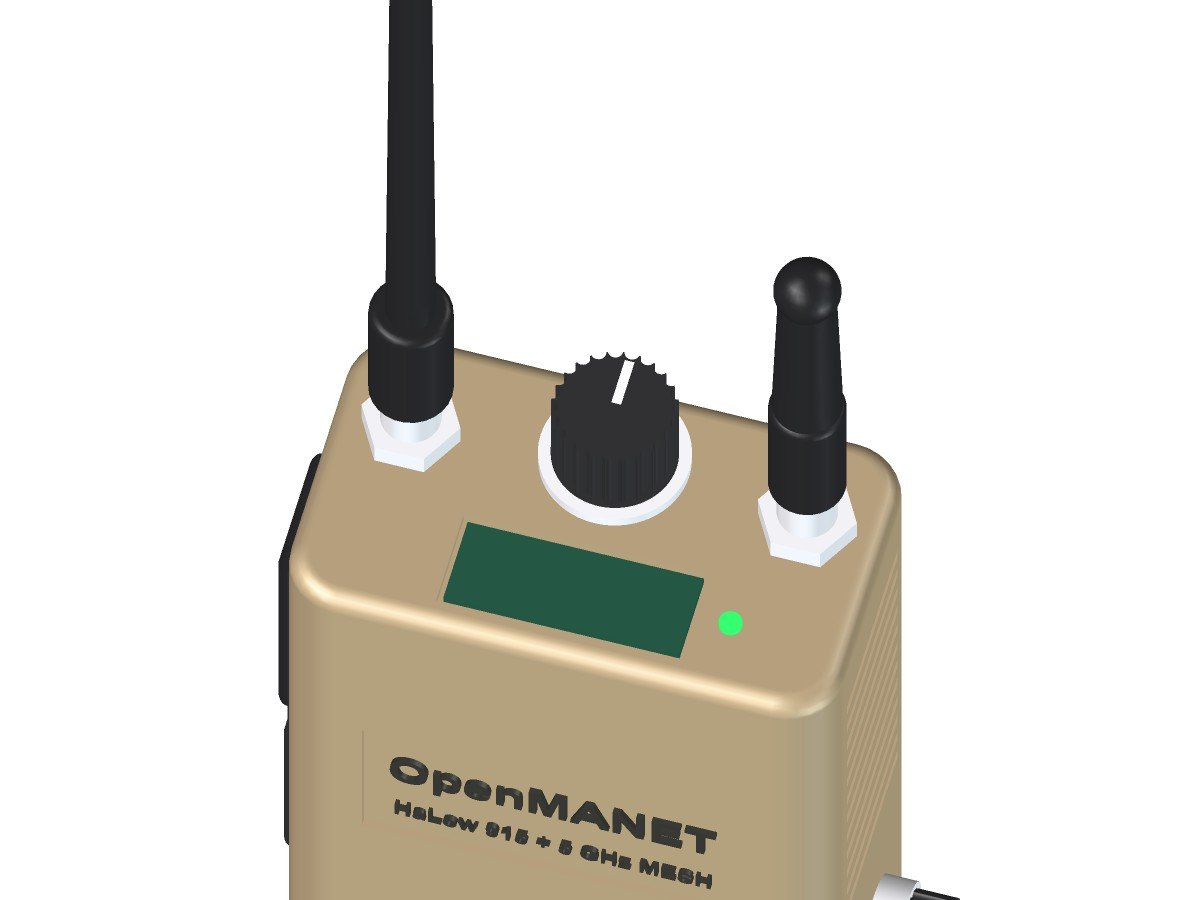
Top panel: two antenna ports, the talk-group knob and a small status screen.
PTT side: push-to-talk and a Kenwood jack
In part 4 I ran push-to-talk from a phone browser. That’s great for testing, but a radio should work with the phone in your pocket.
- A big ribbed PTT bar on the left side where your thumb lands.
- A Kenwood 2-pin accessory jack under it, so any standard speaker mic or earpiece plugs straight in. I rarely expect to use VOX.
- Audio and PTT come from the OpenVLM design, the open-source CM108B USB audio board from the OpenMANET community. OpenMANET already auto-detects it, so hardware PTT works with stock software.
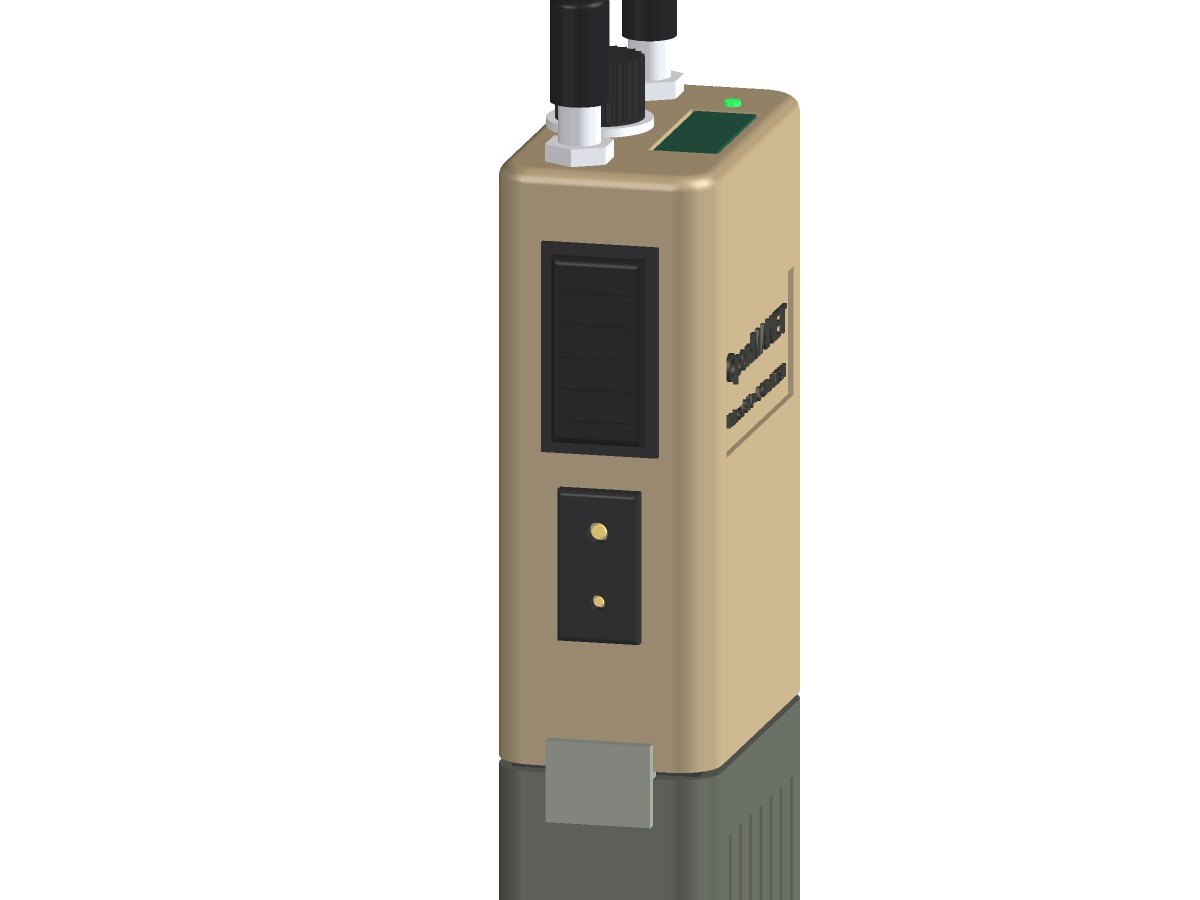
PTT side: a big ribbed push-to-talk bar over a Kenwood 2-pin jack for a speaker mic or earpiece.
Back and right side: fins and a data port
The back is all fins. The right side gets fins up high and a capped, sealed data port down low. That port is for the drone detection station: plug it in, and its bearings go out over the mesh as Cursor-on-Target to every ATAK screen.
Back side: fins on the back and right side, plus the capped data port for the drone DF station.
The swap-on battery
The whole point of putting the battery on the bottom is to swap it and keep going.
- A PRC-148/152 (MBITR)-style interface. I’ll buy one adapter kit to learn the geometry, then 3D-print the mating faces on the radio and the pack and only buy the metal contacts from there.
- Custom 3D-printed battery boxes, not off-the-shelf military batteries, with 21700 cells inside.
- A small onboard backup cell keeps the radio alive for the few seconds the pack is off.
- The pack design comes last. Its size and shape follow the body, so this block in the render is a placeholder for the volume.
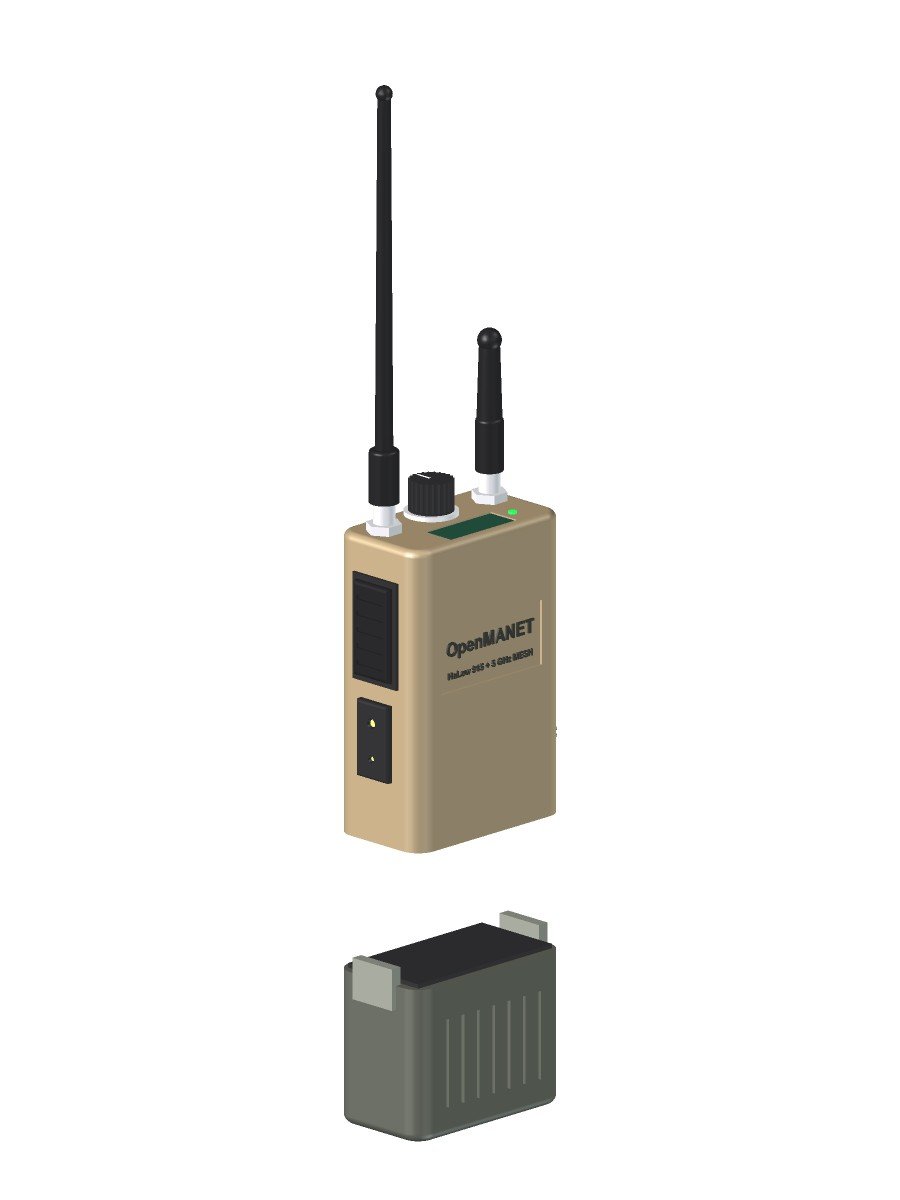
Battery pack off: an MBITR-style interface on top of a custom 3D-printed pack, with side latches.
What’s inside (planned)
| Block | Plan |
|---|---|
| Computer | Raspberry Pi CM4 with eMMC, on a custom KiCad carrier board |
| HaLow radio | Gateworks GW16167 (Morse Micro MM8108) on an M.2 E-key slot |
| 5 GHz radio | PCIe M.2 card that supports 802.11s mesh (MT7916 family) |
| Audio / PTT | OpenVLM CM108B design, out to the Kenwood 2-pin jack |
| Controls | Rotary talk-group switch on GPIO, PTT, status screen, LED |
| Power | Swap-on 21700 pack, small backup cell, power path on the carrier |
| Not included | 5G modem. Too much heat, power and antenna for a handheld; that lives in the mesh gate or a future vehicle unit. |
And a standing rule: encryption stays on. If I ever have to choose between more transmit power and keeping the mesh encrypted, encryption wins.
What these renders don’t settle
- Real dimensions. The carrier board outline drives the body, so the board comes first.
- Antenna spacing. Two radios a few centimeters apart on one lid need real isolation testing.
- Heat. Whether a finned ASA shell can actually carry the CM4’s heat with two radios running is something to measure, not guess.
- The screen and the exact connector part numbers.
The model is plain FreeCAD Part geometry, built so I can change the numbers and regenerate. These images come straight from FreeCAD’s viewer: no ray tracer, just honest-looking boxes. Next steps are the carrier board in KiCad and a range walk with the bench nodes.
The OpenMANET build log
—
TL;DR: I modeled the OpenMANET handheld concept in FreeCAD: SC4200EP-sized finned ASA body, HaLow whip plus 5 GHz stub, a GPIO talk-group knob, a sunlight- and NVG-friendly status screen, side PTT with a Kenwood 2-pin jack, a data port for the DF station, and an MBITR-style swap-on battery. Concept only; the carrier board sets the real size.
Pingback: OpenMANET: A Wi-Fi HaLow Mesh Radio Worth Building | Signals & StaticSignals & Static
Pingback: Two-Node OpenMANET Mesh Is Up (and Push-to-Talk Works) | Signals & StaticSignals & Static
Pingback: OpenMANET Dual-Band Plan: HaLow + 5 GHz, CM4 and a Handheld | Signals & StaticSignals & Static